Even a perfectly reconstituted peptide can lose potency if it isn't stored correctly afterward. Temperature swings, light exposure, and simple time all affect how long a peptide solution stays viable for research use. This guide breaks down what actually degrades peptides in storage, how to store both lyophilized and reconstituted vials correctly, and how to recognize the warning signs of a peptide that's gone bad.
Peptide Injection Technique 101: Sites, Needles, and Technique
Reconstituting and dosing a peptide correctly only gets a researcher halfway there — the injection itself matters just as much. This guide covers subcutaneous injection basics for research peptides: choosing an appropriate site, needle gauge and length considerations, site rotation to avoid tissue irritation, and the common technique mistakes that can affect a study's consistency.
Why Injection Technique Matters
Subcutaneous injection technique is often treated as an afterthought compared to reconstitution and dosing, but poor technique can introduce its own variability into a research protocol. Injecting into the wrong tissue layer, reusing the same site repeatedly, or using an inappropriate needle can all affect absorption and irritate tissue, complicating the interpretation of results. Establishing a consistent, correct technique from the start helps keep a protocol reproducible from one administration to the next.
Choosing an Injection Site and Rotating Properly
Common subcutaneous injection sites include the abdomen (avoiding a two-inch radius around the navel), the outer thigh, and the back of the upper arm, each offering a layer of fatty tissue suited to subcutaneous administration. Rotating between sites, and between different spots within the same site, helps prevent the buildup of scar tissue, lumps, or localized irritation known as lipohypertrophy. A simple rotation schedule, such as moving clockwise around the abdomen or alternating sides day to day, is an easy way to keep track of previous injection points.
Needle Gauge and Length: What the Research Literature Uses
Subcutaneous research injections are typically performed with thin needles in the 29-31 gauge range and lengths between 4mm and 8mm, sized to reach the subcutaneous fat layer without going deeper into muscle. Thinner, shorter needles are generally associated with less discomfort and are suitable for most body types, while length may need to be adjusted slightly based on individual tissue thickness. Needles should always be sterile, single-use, and disposed of properly in a sharps container after each administration.
Step-by-Step Subcutaneous Injection Technique
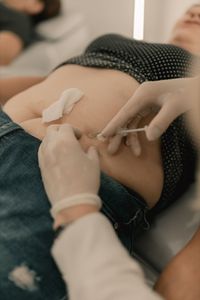
A typical subcutaneous injection begins with washing hands and cleaning the chosen site with an alcohol swab, allowing it to fully dry before proceeding. Gently pinching a fold of skin, the needle is inserted at roughly a 45- to 90-degree angle depending on needle length and tissue thickness, then the plunger is depressed slowly and steadily. After withdrawing the needle, light pressure with a clean gauze pad (without rubbing) helps minimize any bruising or leakage at the site.
Common Mistakes That Affect Consistency and Comfort
Some of the most frequent technique errors include injecting too quickly, which can cause pressure and discomfort at the site, and failing to let the alcohol dry before injecting, which can cause a stinging sensation. Others include not rotating sites often enough, injecting into scar tissue or bruised areas, and using a needle that's dull from repeated reuse. Keeping a simple injection log alongside dosing records makes it easier to track sites, spot patterns, and maintain consistent technique across a study.